Um sistema de autoirrigação é uma das melhores maneiras de manter um jardim vertical saudável e de baixa manutenção. Fornecendo um suprimento constante de umidade diretamente às raízes das plantas, esse sistema reduz a necessidade de regas frequentes, evita o excesso ou a falta de água e garante hidratação consistente para as plantas.
Neste guia, você aprenderá:
✔ Os benefícios de um sistema de autoirrigação para jardins verticais
✔ Diferentes tipos de sistemas de autoirrigação
✔ Como construir e instalar um sistema de autoirrigação passo a passo
✔ Melhores práticas para manutenção e uso eficiente da água
Vamos começar! 🌿💦
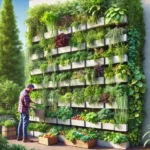
🌱 Por que Usar um Sistema de Autoirrigação em um Jardim Vertical?
Um sistema de autoirrigação ajuda a manter as plantas saudáveis garantindo um suprimento contínuo de água.
✔ Economiza Tempo e Esforço
✔ Elimina a necessidade de regar diariamente, ideal para quem tem uma rotina agitada.
✔ Mantém as plantas hidratadas mesmo quando você viaja ou fica fora por alguns dias.
✔ Previne o Excesso ou a Falta de Água
✔ Garante que as plantas recebam a quantidade certa de umidade, reduzindo o estresse.
✔ Evita o apodrecimento das raízes devido ao excesso de umidade ou a desidratação.
✔ Melhora a Eficiência no Uso da Água
✔ Direciona a água diretamente às raízes, reduzindo o desperdício.
✔ Funciona bem em varandas, telhados e jardins internos com acesso limitado à água.
Agora, vamos explorar os diferentes tipos de sistemas de autoirrigação disponíveis para jardins verticais.
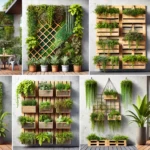
🚰 Tipos de Sistemas de Autoirrigação para Jardins Verticais
Existem várias maneiras de configurar um sistema de autoirrigação, dependendo do tamanho do seu jardim, orçamento e nível de automação desejado.
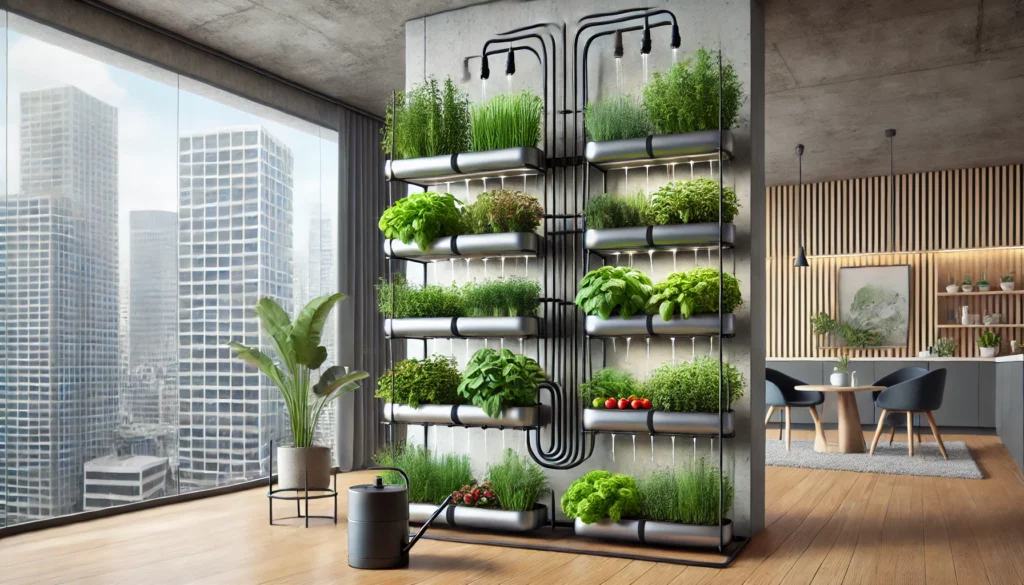
1. Sistema de Irrigação por Gotejamento (Melhor para jardins verticais maiores)
✔ Usa tubos e emissores para liberar água lentamente diretamente nas raízes das plantas.
✔ Pode ser programado com um temporizador para regas automáticas.
2. Sistema por Capilaridade (Melhor para vasos pequenos e jardins internos)
✔ Usa um pavio (como um cordão de algodão) para puxar água de um reservatório para o solo.
✔ Ideal para ervas, hortaliças e plantas em vasos pequenos.
3. Vasos Autoirrigáveis (Ótimo para varandas e pequenos espaços)
✔ Possuem reservatórios de água embutidos que permitem que as plantas absorvam umidade conforme necessário.
✔ Reduz a frequência de rega para uma vez a cada 7-10 dias.
4. Sistema de Irrigação por Gravidade (Solução simples e eficaz para pequenas hortas verticais)
✔ Usa um recipiente elevado com água que alimenta tubos conectados aos vasos.
✔ Funciona bem para vasos suspensos e floreiras verticais.
5. Cristais Hidrogel e Materiais Retentores de Umidade (Ótimos para áreas com clima seco)
✔ Absorvem e liberam água lentamente ao longo do tempo, mantendo o solo úmido.
✔ Funcionam bem para suculentas, ervas e vegetais.
Depois de escolher o melhor sistema para o seu jardim vertical, é hora de configurá-lo passo a passo.
🛠️ Como Construir um Sistema de Autoirrigação para um Jardim Vertical?
Passo 1: Reunir os Materiais Necessários
Para um sistema de irrigação por gotejamento, você precisará de:
✔ Tubos de irrigação por gotejamento (¼ ou ½ polegada)
✔ Emissores (1-2 por planta)
✔ Reservatório de água (balde ou tanque)
✔ Temporizador (opcional para automação)
✔ Conectores e encaixes
Para um sistema por capilaridade, você precisará de:
✔ Um recipiente de água (garrafa plástica ou jarra)
✔ Cordão de algodão ou pavio de nylon
✔ Vasos com furos de drenagem
Passo 2: Instalar o Reservatório de Água
✔ Posicione um recipiente grande de água em um local elevado.
✔ Se estiver usando irrigação por gotejamento, conecte os tubos ao reservatório.
✔ Se estiver usando um sistema por capilaridade, mergulhe uma ponta do pavio na água e a outra no solo.
Passo 3: Conectar as Linhas de Irrigação às Plantas
✔ Passe os tubos de gotejamento ao longo de cada fileira de vasos e fixe-os com grampos.
✔ Instale os emissores de gotejamento próximos às raízes das plantas.
✔ No sistema por capilaridade, garanta que o pavio toque diretamente nas raízes.
Passo 4: Ajustar o Fluxo de Água
✔ No sistema por gravidade, controle o fluxo com uma pequena válvula.
✔ No sistema de gotejamento, programe o temporizador para regar por 10-20 minutos diários.
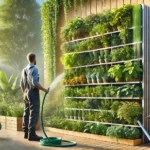
Passo 5: Testar e Ajustar o Sistema
✔ Ligue o sistema e verifique se todas as plantas estão recebendo água suficiente.
✔ Ajuste a taxa de fluxo para evitar excesso ou falta de água.
Agora que seu sistema de autoirrigação está funcionando, vamos falar sobre como mantê-lo para garantir sua eficiência a longo prazo.
🔧 Como Manter um Sistema de Autoirrigação?
✔ Verifique regularmente entupimentos e vazamentos
🔹 Inspecione as linhas de gotejamento e emissores semanalmente.
🔹 Limpe o sistema com água corrente a cada poucos meses para evitar entupimentos.
✔ Reabasteça o reservatório de água conforme necessário
🔹 Monitore os níveis de água e reponha quando estiver baixo.
🔹 No verão, verifique com mais frequência, pois as plantas precisarão de mais água.
✔ Ajuste para mudanças sazonais
🔹 Reduza a frequência de rega no inverno para evitar solo encharcado.
🔹 Aumente a irrigação no verão para evitar ressecamento das plantas.
Seguindo essas práticas, seu sistema de autoirrigação manterá seu jardim vertical saudável o ano todo. 🌱
💡 Dicas para Otimizar o Uso da Água
✔ Use cobertura morta para reter a umidade
🔹 Adicione uma camada fina de palha, lascas de madeira ou fibra de coco para reduzir a evaporação.
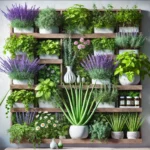
✔ Agrupe plantas conforme a necessidade de água
🔹 Coloque plantas que exigem mais umidade, como tomate e manjericão, juntas.
🔹 Separe suculentas e plantas resistentes à seca.
✔ Reutilize a água da chuva para regar
🔹 Instale um barril para coletar água da chuva e reabastecer o reservatório naturalmente.
🔹 Reduza o uso de água potável e economize dinheiro.
Com essas estratégias, seu sistema de autoirrigação será mais eficiente, econômico e sustentável. 🌿💧
🌱 Conclusão
Configurar um sistema de autoirrigação para um jardim vertical é uma solução inteligente e de baixa manutenção para manter as plantas hidratadas e saudáveis. Seja com irrigação por gotejamento, sistema por capilaridade ou vasos autoirrigáveis, automatizar a rega ajuda a economizar tempo, reduzir o desperdício e promover o crescimento vigoroso das plantas.
👉 Você instalaria um sistema de autoirrigação no seu jardim vertical? Conte-nos qual método funciona melhor para o seu espaço! 🌿💦😊